Backup Therapy for Paranoid Photographers, Part 2
By Tim Grey–
Variability.
I am often asked whether it is best to use a full backup solution where the backup is replaced each time you perform a backup, or an incremental backup where only changes made since the last backup are copied. My answer is to use both of these approaches.
There are advantages and disadvantages to each type of backup, and so I encourage you to use more than one approach to help make up for the limits of each approach.
SPECIAL OFFER - $20 Off the GreyLearning Bundle
With a subscription to GreyLearning, you gain access to all existing courses in the video training library, as well as all new courses published during your subscription. All video lessons can be viewed through the GreyLearning website, or downloaded to your computer so you will have permanent access to the lessons. For more information, visit GreyLearning at: http://greylearning.com
In general, my preference is to use a synchronization approach to backing up my photos. With this approach (discussed in more detail in the September 2014 issue of Pixology magazine), each time you synchronize you are updating the backup copy of your photos to be an exact match of your primary photo storage. In this way, if your primary storage drive fails you can simply connect the backup drive in the place of the failed drive and continue working. Only photos or other data updated since the last synchronization would be missing at this point.
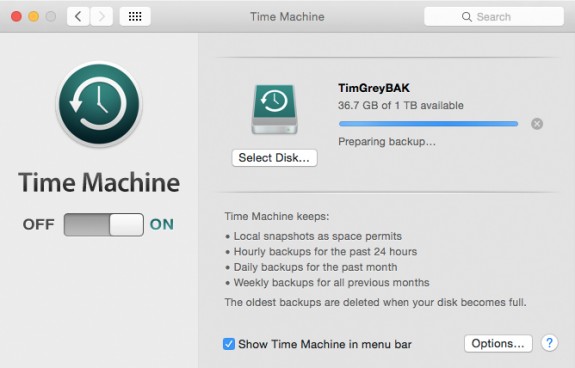
While I use synchronization software as my primary method of backing up my photos, I also employ an incremental backup as an additional precaution.
However, using a synchronization approach to backing up your data also means you will duplicate any mistakes you’ve made. So, for example, if you accidentally delete a folder full of images and then perform a synchronization backup, the deleted photos will be deleted from the backup drive and you may not be able to recover those photos.
An incremental backup solution helps to overcome the risk of the various mistakes that might be duplicated through synchronization. Using both a synchronization backup and an incremental backup also means you have more than one backup, which provides additional peace of mind. So, if you can’t decide between two options for backing up your photos, it might make sense to employ both options.
Redundant Redundancy
To amplify the point that has been made already, having multiple backups can be tremendously helpful in terms of providing an extra layer of protection for your photos.
To begin with, the more backup copies you have of your photos the greater the chance you’ll be able to recover from even the most unexpected challenges. For example, if by some especially bad set of circumstances you experience the failure of two hard drives—both the primary storage drive and a backup drive—having a second backup drive will provide a benefit you will greatly appreciate.
My preference is to rotate through two (or more) backup drives. So, let’s assume my primary storage location is called “Photos”, and the backup drives are called “Backup A” and “Backup B”. You can keep the backup drives stored in a separate physical location, for example, only bringing a backup drive to the same location where your primary storage is located when you are going to update the backup.
Furthermore, you can then alternate between the two (or more) backup drives. So, while “Backup A” is connected to your computer along with “Photos” in order to update your backup, “Backup B” is still at a different location.
Having multiple backup copies also provides additional opportunities for you to recover from a mistake. For example, if you delete photos from your “Photos” drive and then perform a synchronization backup to “Backup A”, you could possibly still recover your photos from “Backup B”.
The key point is to anticipate the possible scenarios that might lead to data loss, and to implement a backup workflow that mitigates as many of those risks as possible. Having multiple backup copies is a relatively easy way to avoid most of the more common causes of data loss.
Copy Instead of Move
The concept of protecting your photos and other data goes beyond what might normally be considered part of a backup workflow, also including other habits that can help make sure you are helping avoid data loss. One of those habits involves copying your photos when in theory you actually want to move them.
For example, when I download images from a digital media card, my true intent is to move the photos from the card to my hard drive, so the card will then be empty and ready to use for capturing new photos. However, if something goes wrong during the process of moving my photos, I might lose photos. To minimize risk, I copy photos from my media card (and make a second copy at the same time as part of this process) rather than moving those photos. When I’m confident that my photos have been safely copied to two storage locations separate of the media card, I feel comfortable formatting that card in my camera so new images can be captured.
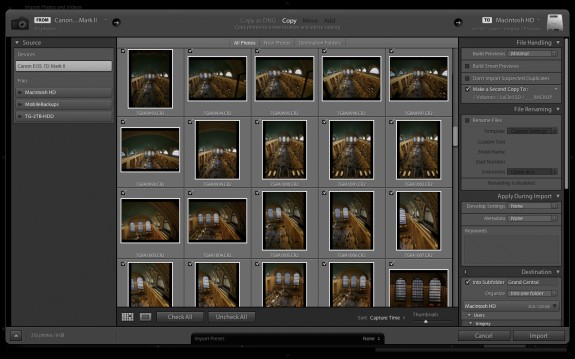
When I might in theory want to move photos from one location to another, such as when importing photos into Lightroom, I actually use the Copy option to help minimize the risk of lost images should something go wrong in the process.
Similarly, when I return home from a trip and want to move photos from the hard drive I was using while traveling to the larger hard drive I use as the master storage location for my photos, I don’t actually move those photos. Instead, I copy the photos from the traveling hard drive to the primary hard drive.
Once I’ve successfully copied photos from my traveling drive to my primary photos drive, I still don’t delete the images from the traveling drive. Instead, I move the folder on that drive into a folder that is clearly identified as a backup folder. Then, when I need to free up storage space on that traveling hard drive, I can review the contents of the backup folder to determine which photos I’m comfortable deleting.
By the time I actually need to free up storage space on my traveling drive, I typically have several copies of the photos I might delete, including on my primary photos drive and on the hard drives I use to backup the photos drive.
The idea here is to preserve additional backup copies of your photos for as long as you reasonably can, in order to ensure as many options for recovering photos in the event you experience a hardware failure or other issue leading to data loss.
Extended Retention
As noted above, I make a point of copying photos when I might otherwise intend to move them, so that I am essentially creating a backup in the process. When I have images that in theory I might otherwise delete, instead I move them into a backup folder or rename the folder to indicate that it is now a backup rather than “original” data.
Taking that process a step further, I also retain those “extra” backup copies for an extended period. In fact, I don’t have a specific schedule for deleting the extra backup copies. Even after I’ve copied photos from a temporary location to my permanent master storage location, and have made one or two backup copies of that master storage, I still retain the “extra” backup copies as an additional precaution.
The only time I actually delete the “extra” backup copies is when I need to free up hard drive storage space. For example, I have a relatively small hard drive I use for storing photos and other data when I am traveling. When I get home from a trip, I copy the photos captured during the trip from this smaller drive to my larger drive used for storing all of my photos. Then I move the photos on the smaller “traveling” hard drive into a backup folder on that drive.
The photos stay in that backup folder, even though I have already backed up my primary storage drive, to the point that I have several copies (one master copy and two backup copies) of the photos from the trip. So the copies on the traveling hard drive represent a fourth copy for those photos. That’s more redundancy than I should ever really need.
However, I don’t feel there is a significant advantage to maintaining extra free space on the traveling hard drive. So the backup copies remain, until that hard drive starts to get full. At that point I will review the backup folder on the traveling hard drive, and identify (and delete) the folders containing extra copies I am comfortable discarding.
I would certainly understand if someone suggested that this step was unnecessary, and perhaps a little extreme in terms of a backup strategy. However, there is no real cost involved with taking this step. Rather, it is simply a matter of developing a particular habit for how I deal with my photos. In the process I have an “extra” backup copy of recent images, which I will hopefully never need. But I have also gained some additional peace of mind with virtually no extra effort.
Consistency
Perhaps the most important habit when it comes to a workflow for backing up your photos and other data is consistency. I have seen far too many photographers lose precious photos even though they had defined an excellent approach to backing up their photos. A backup plan is meaningless if you don’t actually follow that plan.
If you define a backup workflow that meets your needs, and then use that workflow consistently, you’ll have the confidence that there is very little risk of losing any of your photographic images.
Too Paranoid?
When I talk with photographers about my perspective and workflow for backing up my photos, I often get teased for being too paranoid. But my photos are important to me, and I’ve dealt with the frustration of losing photos due to hard drive failures, making stupid mistakes, and other issues. I don’t want to ever lose another photo.
When it comes to defining a backup workflow, a big part of the process is determining how much trouble to go to in order to protect your photos. Naturally there are going to be limits. For example, contrary to all of the habits outlined above, there are situations where my photos are at risk.
For example, when I’m traveling I generally have a primary storage drive and a backup storage drive. But both of those drives are with me during the trip, being carried in the same camera bag and being left in the same hotel room, for example. That isn’t an ideal solution for protecting my photos, but I generally don’t feel it is worth the effort to also ship an additional backup hard drive back home or to upload my photos to a server as an additional offsite backup solution.
I have defined a workflow that works for me in terms of protecting my data without requiring a tremendous amount of extra effort. If you take a little time to consider what approach might be best for backing up your photos, and to develop habits that will ensure your photos are safe, you can feel much more confident that your photos actually are safe.
I have gotten to the point that I don’t actually worry about hard drive failures, for example, because I am confident that I have a good backup solution that I am putting to use consistently. I encourage you to ensure you have the same (or greater) degree of confidence in your own backup solution.
Special Offer – $20 Off the GreyLearning Bundle
With a subscription to GreyLearning, you gain access to all existing courses in the video training library, as well as all new courses published during your subscription. All video lessons can be viewed through the GreyLearning website, or downloaded to your computer so you will have permanent access to the lessons. For more information, visit the GreyLearning website here:
Original Publication Date: April 14, 2015
Article Last updated: April 14, 2015
Comments are closed.


Categories
About Photographers
Announcements
Back to Basics
Books and Videos
Cards and Calendars
Commentary
Contests
Displaying Images
Editing for Print
Events
Favorite Photo Locations
Featured Software
Free Stuff
Handy Hardware
How-To-Do-It
Imaging
Inks and Papers
Marketing Images
Monitors
Odds and Ends
Photo Gear and Services
Photo History
Photography
Printer Reviews
Printing
Printing Project Ideas
Red River Paper
Red River Paper Pro
RRP Newsletters
RRP Products
Scanners and Scanning
Success on Paper
Techniques
Techniques
Tips and Tricks
Webinars
Words from the Web
Workshops and Exhibits
all
Archives
March, 2024
February, 2024
January, 2024
December, 2023
November, 2023
October, 2023
September, 2023
August, 2023
May, 2023
more archive dates
archive article list


